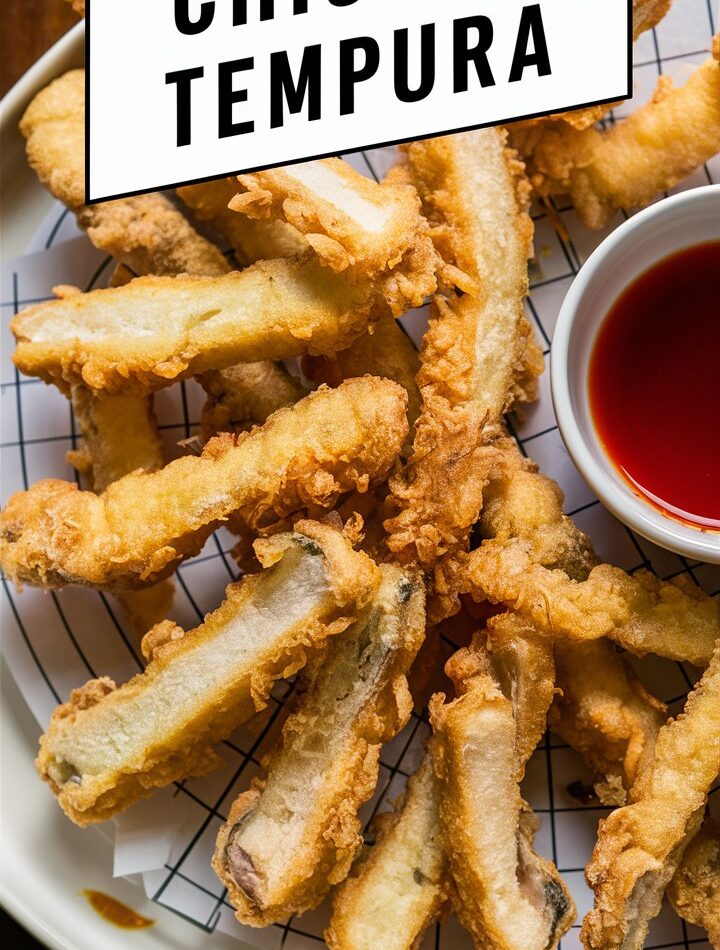
Crispy. Juicy. Irresistible. That’s how one could describe a perfectly cooked piece of Chicken Tempura—a dish that bridges Japanese culinary tradition and global comfort food. While tempura is often associated with seafood and vegetables, chicken tempura has earned its place on the dining table thanks to its hearty texture, light coating, and ability to satisfy both kids and adults.
In this comprehensive guide, you’ll not only learn how to make golden, restaurant-quality Chicken Tempura at home but also understand the science behind its unique texture, discover creative serving options, master reheating techniques, and avoid common pitfalls—ensuring your chicken comes out perfectly crispy, every single time.
🧂 What Makes Chicken Tempura Different?
Traditional tempura is all about delicate, light, non-greasy batter. Unlike heavy breaded fried chicken, tempura uses minimal ingredients and relies on technique—cold ingredients, light mixing, and high heat. When done correctly, the result is an ultra-thin, crispy shell that doesn’t overpower the meat.
But Chicken Tempura brings its own magic:
- Hearty Protein: Chicken offers a juicy, satisfying bite that absorbs marinades and seasoning well.
- Kid-Friendly: Less intimidating than shrimp or squid tempura, chicken is widely loved.
- Flexible Pairing: From rice bowls to salads and dipping sauces, chicken tempura plays well with a variety of flavors.
🔪 Tools You’ll Need
Making perfect tempura at home is simpler than it seems—if you’re equipped with the right tools:
| Tool | Purpose |
|---|---|
| Deep Fryer / Dutch Oven | Maintains consistent oil temperature (350°F/175°C is key) |
| Meat Tenderizer | Ensures uniform thickness for even cooking |
| Mixing Bowls | For batter and marinating chicken |
| Thermometer | Crucial to avoid oil that’s too cool or too hot |
| Slotted Spoon | Allows safe removal of fried items while draining oil |
| Cooling Rack | Keeps chicken crisp post-fry (better than paper towels alone) |
🍗 Ingredients Overview
For the Chicken:
- 1 lb boneless, skinless chicken breast (or thighs for juicier texture)
- 1 tbsp soy sauce (low-sodium works best)
- 1 tsp ginger, finely minced
- 1 tsp garlic, finely minced
- ¼ tsp kosher salt
- ¼ tsp ground black pepper
For the Tempura Batter:
- 1 large egg (cold)
- ½ cup cake flour (for lightness)
- ½ cup cornstarch (adds crispiness)
- ½ cup ice-cold water
- 1 tsp baking soda
For Frying:
- Vegetable oil (neutral oil like canola or sunflower)
Optional Garnish:
- Chopped fresh parsley or green onions
- Toasted sesame seeds
👩🍳 Step-by-Step Instructions
Step 1: Prep the Chicken
- Use a meat mallet to gently pound the chicken to about ½-inch thick.
- Slice into even strips (about finger-width) to ensure uniform cooking.
Step 2: Season the Chicken
- In a bowl, combine chicken with soy sauce, ginger, garlic, salt, and pepper.
- Let it marinate for 10–15 minutes. This enhances flavor and tenderizes the meat.
Step 3: Make the Batter
- In a clean bowl, sift together cake flour, cornstarch, and baking soda.
- In a separate bowl, beat the egg and add the ice-cold water.
- Gently mix the wet ingredients into the dry using chopsticks or a fork—do not overmix. The batter should be lumpy and thin.
🔍 Tip: Keep the batter in the fridge until you’re ready to fry to maintain cold temperature.
Step 4: Heat the Oil
- Fill your fryer or pot with oil to about 2-3 inches depth.
- Heat to 350°F (175°C). Use a thermometer—don’t guess.
Step 5: Coat & Fry
- Dip marinated chicken strips into the batter and immediately transfer to the hot oil.
- Fry 3–5 pieces at a time to prevent temperature drop.
- Cook for 3–5 minutes, flipping once, until golden and crisp.
- Use a slotted spoon to remove and drain on a wire rack.
⚠️ Don’t place on paper towels directly—this traps steam and softens the crust.
🌶️ Best Dipping Sauces for Chicken Tempura
- Soy Sauce + Lemon Juice: Classic, salty and bright.
- Spicy Mayo: Mayo + Sriracha + a dash of lime juice.
- Sweet Chili Sauce: Perfect balance of heat and sweetness.
- Teriyaki Glaze: For a rich, umami twist.
Want a more authentic touch? Add grated daikon radish and shichimi togarashi to your sauce.
🍱 How to Serve Chicken Tempura
🍽️ As an Appetizer:
Serve on a platter with assorted dipping sauces and toothpicks.
🍚 In a Bento Box:
Layer chicken over steamed rice with pickled cucumbers, edamame, and fruit slices.
🥗 With Salad:
Pair with sesame vinaigrette over a mixed greens salad for a refreshing lunch.
🍜 As a Main Dish:
Add chicken tempura to udon or soba noodle bowls for a complete meal.
🍴 Best Side Dishes
Here are some stellar sides to serve with chicken tempura:
| Side Dish | Why It Works |
|---|---|
| Miso Soup | Adds warmth and traditional Japanese flavor |
| Steamed Rice | Balances the richness of fried chicken |
| Edamame | Light, salty, protein-packed |
| Cold Soba Noodles | Refreshing contrast with warm, crispy chicken |
| Cucumber Sunomono | Sweet-sour salad that cleanses the palate |
| Tempura Veggies | Carrots, zucchini, mushrooms—fry them in leftover batter! |
🛠️ Tips for Perfect Tempura Every Time
- Use ice-cold water for the batter to delay gluten formation.
- Avoid overmixing—lumps help make the coating airy.
- Control oil temperature precisely. 350°F is the golden rule.
- Fry in small batches to maintain hot oil.
- Drain correctly—a rack over paper towel prevents sogginess.
❌ Common Mistakes to Avoid
| Mistake | Result |
|---|---|
| Batter too thick | Results in dense, heavy crust |
| Using warm water for batter | Causes soggy coating |
| Crowding the fryer | Lowers temperature, leads to greasy tempura |
| Skipping marinade | Bland, dry chicken |
| Reusing old oil multiple times | Bitter taste and uneven frying |
❄️ Storage & Reheating Instructions
Fridge:
- Store in an airtight container for up to 2 days.
- Reheat in the oven or air fryer, not microwave, to restore crispiness.
Freezer:
- Flash freeze on a tray, then store in a freezer-safe bag.
- Best if used within 1 month.
Reheating:
- Oven: 375°F (190°C) for 10–15 mins.
- Air Fryer: 350°F (175°C) for 6–8 mins.
- Skillet: Light oil, 2–3 mins per side.
🙋 Frequently Asked Questions (FAQ)
Can I make it gluten-free?
Yes! Substitute cake flour with gluten-free flour and use tamari instead of soy sauce.
Can I use chicken thighs?
Absolutely. Thighs offer more moisture and flavor—just trim excess fat.
Can I air fry instead of deep fry?
You can, but it won’t be traditional tempura. The batter may cook differently without full submersion in oil.
Can I use this recipe for shrimp or veggies?
Yes! The batter is versatile. Try with zucchini, carrots, shrimp, or mushrooms.
🎉 Final Thoughts
Homemade Chicken Tempura is a culinary delight that’s simpler than you think. With the right tools, a few essential tips, and a little patience, you can recreate that delicate, crispy exterior and juicy interior that rivals your favorite Japanese restaurant.
Whether it’s for a cozy dinner at home or a party-worthy appetizer, this Chicken Tempura recipe is bound to impress.


