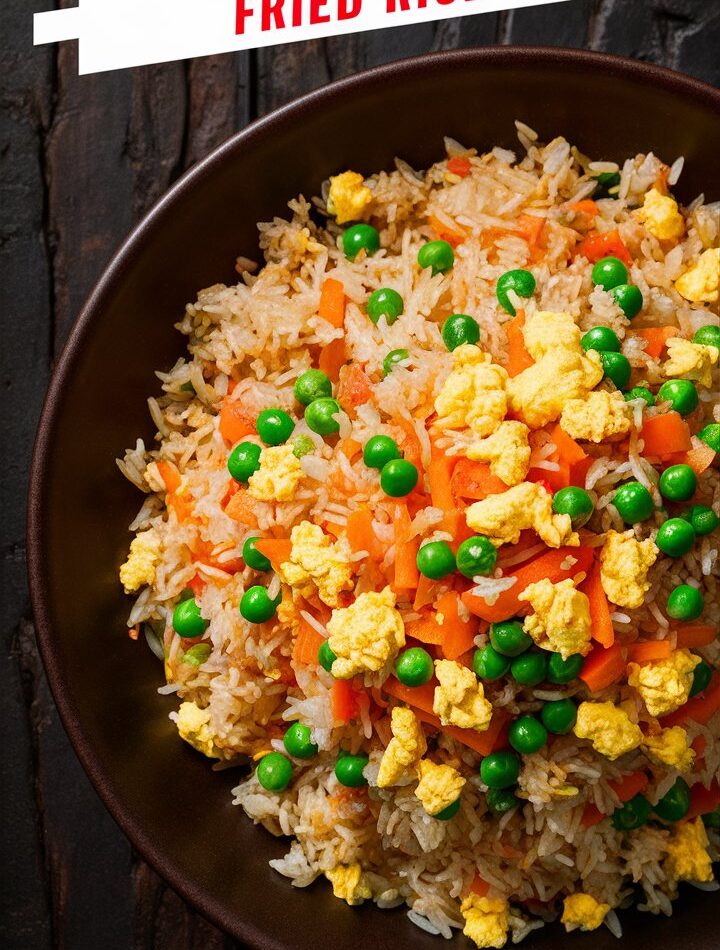
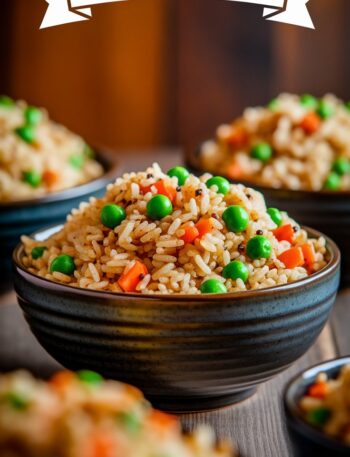
If you’ve ever dined at a Japanese steakhouse, you know that one of the highlights—aside from the dazzling knife tricks—is the irresistible hibachi-style fried rice. Smoky, buttery, umami-packed, and perfectly textured, this iconic dish is no longer exclusive to hibachi grills. You can make it right in your home kitchen with a few everyday ingredients and some simple techniques.
In this in-depth guide, we’ll explore how to make authentic-tasting hibachi-style fried rice, how to customize it with proteins and vegetables, tips to elevate flavor, what tools you’ll need, and even how to store and reheat leftovers. Whether you’re meal-prepping or planning a weeknight dinner, this dish is a versatile winner for all ages.
What Is Hibachi-Style Fried Rice?
Hibachi-style fried rice is a Japanese-American dish often prepared on a flat-top grill in front of restaurant guests. “Hibachi” traditionally refers to a Japanese heating device, but in the U.S., it often implies teppanyaki-style cooking—a method that uses a large, flat iron grill.
This style of fried rice is typically made with:
- Day-old white rice
- Soy sauce
- Butter
- Egg
- Vegetables like onions, carrots, and peas
Unlike other Asian fried rice dishes that may use dark soy sauce or garlic, hibachi rice is cleaner and simpler, allowing each ingredient to shine with subtle smoky richness from the high-heat cooking method.
Why Make Hibachi Fried Rice at Home?
- ✅ Quick to Make: Ready in under 30 minutes with pre-cooked rice.
- ✅ Budget-Friendly: Made with pantry staples and customizable leftovers.
- ✅ Kid-Approved: Mild, savory flavors that the whole family will love.
- ✅ Meal-Prep Friendly: Stores and reheats exceptionally well.
- ✅ Customizable: Add shrimp, steak, chicken, tofu, or extra veggies.
Essential Ingredients
To replicate authentic hibachi-style flavor, your ingredient list should be simple but high quality.
Base Ingredients
| Ingredient | Purpose |
|---|---|
| Day-old white rice (short or medium-grain) | Prevents soggy texture |
| Unsalted butter | Adds richness and authentic flavor |
| Soy sauce (low-sodium) | Provides saltiness and umami |
| Neutral oil (canola, peanut, or vegetable) | High smoke point for frying |
| Eggs | Adds protein and silkiness |
| White onion | Sweetness and texture |
| Carrots | Slight crunch and natural sweetness |
| Peas | Color and texture contrast |
Optional Add-ons
- Sesame oil (for fragrance)
- Garlic powder
- Fresh scallions
- Sliced mushrooms
- Baby corn or broccoli
- Cooked protein (shrimp, steak, chicken, tofu)
Tools You’ll Need
You don’t need a flat-top grill—just the right kitchen tools.
| Tool | Why You Need It |
|---|---|
| Wok or large skillet | Allows fast, even cooking |
| Spatula | For tossing and stir-frying ingredients |
| Knife & cutting board | Prepping veggies and proteins |
| Bowl & whisk | For scrambling eggs |
| Measuring spoons | For seasoning accuracy |
Step-by-Step Instructions: How to Make Hibachi-Style Fried Rice
Here’s how to bring that restaurant-quality taste to your home kitchen.
🥄 Step 1: Prep Your Rice (Use Day-Old!)
Freshly cooked rice contains too much moisture and will become mushy when stir-fried. To get that firm, slightly chewy texture:
- Cook your rice (preferably short or medium grain).
- Let it cool completely.
- Refrigerate for at least 6 hours, ideally overnight.
- Fluff before using.
Pro Tip: If you’re in a rush, spread freshly cooked rice on a baking sheet and chill it in the freezer for 30 minutes.
🍳 Step 2: Cook the Egg
- Heat 1 tablespoon of oil in your skillet.
- Add 1–2 whisked eggs.
- Scramble gently until just cooked through.
- Remove and set aside.
Pro Tip: Don’t overcook the eggs—soft and fluffy is the goal!
🥕 Step 3: Sauté the Vegetables
- Add a bit more oil.
- Sauté diced onions, carrots, and peas for about 4–5 minutes.
- Season with a pinch of salt and pepper.
You want the vegetables tender but not soggy.
🍚 Step 4: Fry the Rice
- Add another tablespoon of oil to the skillet.
- Add your cold rice.
- Use the spatula to break apart clumps.
- Stir-fry for 4–6 minutes until the rice is lightly browned and evenly warmed.
🧈 Step 5: Add Flavor
- In a small bowl, mix 4 tablespoons of softened butter with 2 tablespoons of soy sauce.
- Add this mixture to the rice and toss until evenly coated.
Optional: Drizzle in 1–2 teaspoons of sesame oil for extra depth.
🥘 Step 6: Combine and Finish
- Return the scrambled eggs and sautéed vegetables to the pan.
- Mix everything until combined.
- Taste and adjust seasoning with more soy sauce if needed.
Best Protein Additions for a Complete Meal
Looking to bulk up your fried rice into a full entrée? Here are your best options:
| Protein | Cooking Tips |
|---|---|
| Grilled Chicken | Marinate in soy sauce and ginger for extra flavor. |
| Steak | Slice thinly and sear on high heat. Use leftover ribeye for a treat. |
| Shrimp | Cooks in under 3 minutes—season with garlic and lime. |
| Tofu | Press, cube, and pan-fry until golden. Use firm or extra-firm tofu. |
| Eggplant or Mushrooms | Ideal for a plant-based version. |
Serving Suggestions: Take Your Hibachi Experience Further
Hibachi-style fried rice isn’t just a side dish—it’s the centerpiece of a flavorful spread. Serve it with:
- 🥟 Gyoza dumplings
- 🥣 Miso soup
- 🥗 Seaweed salad
- 🍢 Yakitori (grilled skewers)
- 🥒 Japanese pickles (tsukemono)
Don’t forget a sprinkle of sesame seeds and sliced scallions for garnish.
Storage & Reheating Instructions
🧊 How to Store Leftovers
| Method | Duration | Tips |
|---|---|---|
| Refrigerator | 3–4 days | Use an airtight container |
| Freezer | Up to 3 months | Cool completely before freezing in zip-top bags |
🔥 How to Reheat Fried Rice Without Drying It Out
- Stovetop (Best): Add oil to a skillet, heat, and stir-fry for 5 minutes.
- Microwave: Use a microwave-safe container and cover with a damp paper towel. Heat in 30-second intervals.
- Oven: Preheat to 350°F (175°C), cover rice with foil, and bake for 15–20 minutes.
Common Mistakes to Avoid
❌ Using Fresh Rice
Always use cold, day-old rice to avoid mushy results.
❌ Overcrowding the Pan
Cook in batches if necessary so the rice can fry rather than steam.
❌ Skimping on Butter or Soy Sauce
The buttery soy base is what gives this dish its signature taste—don’t skip or skimp!
❌ Cooking at Low Heat
Use high heat for a smoky sear, just like at the restaurant.
Expert Tips to Perfect Your Fried Rice
- Use a Carbon Steel Wok: It retains heat better and adds a mild “wok hei” flavor.
- Prep Everything First: Mise en place ensures nothing burns while you’re multitasking.
- Use Two Types of Oil: Start with neutral oil, finish with aromatic sesame oil.
- Let It Sit: After tossing everything, let the rice sit for 30 seconds to develop a crust.
Make It Vegetarian or Gluten-Free
- Vegetarian: Omit meat and use plant-based butter. Add mushrooms or tofu for bulk.
- Gluten-Free: Substitute soy sauce with tamari or coconut aminos.
- Low Carb: Try riced cauliflower or shirataki rice as a base.
FAQs About Hibachi-Style Fried Rice
Q1: Can I use jasmine or basmati rice instead of short-grain?
A: You can, but short-grain holds together better and provides a chewier bite.
Q2: How do I make it spicy?
A: Add chili oil, red pepper flakes, or sriracha when frying the rice.
Q3: Can I meal prep this?
A: Absolutely! Make a double batch and divide into containers for the week.
Q4: Is hibachi rice healthy?
A: It can be! Use brown rice, reduce the butter, and load up on veggies for a nutritious twist.
Final Thoughts
Hibachi-style fried rice is a celebration of bold flavors, simple ingredients, and quick cooking. Whether you’re replicating your favorite steakhouse experience or just want a fast, family-friendly dinner, this dish checks all the boxes. Once you master the technique, it’s easy to experiment with new ingredients and protein combinations.


