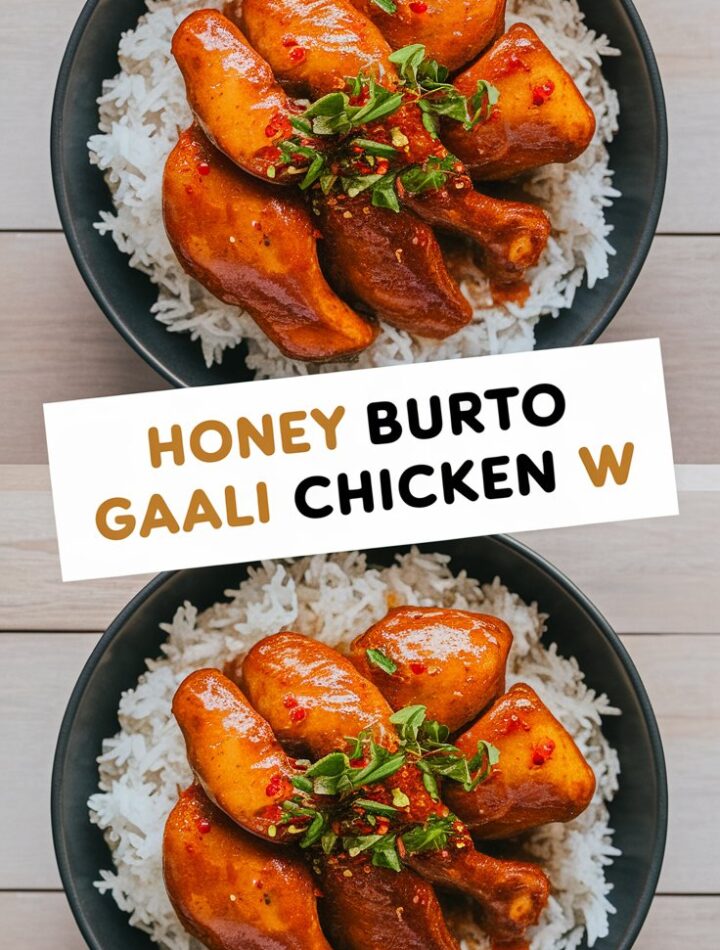
If there’s one recipe that can turn any ordinary evening into a restaurant-quality dinner, it’s Honey Butter Garlic Chicken. Imagine golden, tender chicken coated in a glossy, sticky glaze made of honey, garlic, butter, and soy — a harmony of sweet, savory, and umami flavors that clings to every bite. This dish looks elegant, tastes divine, and yet takes less than 20 minutes to prepare from start to finish.
It’s the kind of recipe that instantly becomes a household favorite — one you’ll find yourself cooking again and again because it’s simple, quick, and absolutely delicious. Whether you’re preparing a comforting weeknight meal or a quick weekend dinner, this skillet-style chicken never disappoints.
In this comprehensive guide, you’ll learn not only how to make the perfect honey garlic glaze but also how to achieve that mouthwatering balance of flavor, avoid common mistakes, and customize it to your liking. Plus, we’ll cover serving ideas, variations, storage, and even reheating tips so your dish stays just as good the next day.
Why You’ll Love This Recipe
Here’s why this Honey Butter Garlic Chicken stands out as one of the best one-pan dinners you’ll ever make:
- Quick & Easy: Ready in about 20 minutes — perfect for busy evenings.
- Irresistibly Flavorful: The sauce delivers the perfect balance of sweet honey, buttery richness, and garlicky punch.
- One-Pan Wonder: Less cleanup means more time to enjoy your meal.
- Family Friendly: Loved by both adults and kids for its mild yet satisfying flavor.
- Versatile: Pair it with rice, noodles, veggies, or even wrap it up in lettuce for a lighter option.
This is comfort food elevated — simple ingredients that transform into something extraordinary when combined with care.
Ingredients You’ll Need
You don’t need anything fancy for this dish. Everything required is probably already in your kitchen.
For the Chicken:
- 8 boneless, skinless chicken thighs – tender, juicy, and ideal for soaking up sauce
- 2 tablespoons cornflour (cornstarch) – helps the chicken crisp and the sauce cling beautifully
- ½ teaspoon salt
- ½ teaspoon black pepper
- 2 tablespoons vegetable oil – for searing the chicken evenly
- 1 tablespoon unsalted butter – adds richness to the sauce
- 4 cloves garlic, minced – the star of the show
For the Honey Garlic Sauce:
- ⅓ cup (110 g) honey – the main sweet component
- ⅓ cup (80 ml) chicken stock – balances sweetness with savory depth
- 1 tablespoon rice vinegar – adds brightness and tang
- 1 tablespoon light soy sauce – introduces saltiness and umami
Optional for Serving:
- Fresh parsley, finely chopped – for garnish
- ½ teaspoon chili flakes – for a little heat
- Boiled jasmine rice or noodles – the perfect base for soaking up the sauce
Preparation Tools
Before you begin, having the right tools makes cooking smooth and enjoyable:
- Large nonstick skillet or frying pan
- Mixing bowls
- Measuring cups and spoons
- Tongs or spatula
- Small whisk or fork for mixing the sauce
Organizing your workspace ensures the dish comes together quickly and flawlessly.
Step-by-Step Instructions
Step 1: Prepare the Chicken
Pat your chicken thighs dry with a paper towel. This step is crucial because excess moisture prevents browning.
In a mixing bowl, combine the chicken with cornflour, salt, and pepper. Toss well until every piece is evenly coated. The light dusting of cornflour helps the sauce stick later and gives the chicken a crisp exterior.
Step 2: Sear the Chicken
Heat vegetable oil in a large skillet over medium-high heat. Once the oil is hot and shimmering, lay the chicken pieces in a single layer. Avoid overcrowding the pan — if needed, cook in batches.
Let them cook undisturbed for 4–5 minutes until a golden crust forms. Flip and cook the other side for another 2 minutes. The color here matters — you’re looking for deep caramelization that enhances both texture and taste.
Step 3: Add the Garlic and Butter
Lower the heat to medium, add the butter, and let it melt. Once melted, stir in the minced garlic. Sauté for 30 seconds to 1 minute, just until fragrant — don’t let it brown or burn. This step releases the signature garlicky aroma that makes the dish irresistible.
Step 4: Prepare the Sauce
In a small bowl, whisk together honey, chicken stock, rice vinegar, and soy sauce. The mix should taste balanced — not too sweet, not too salty. Adjust with a splash more vinegar or soy sauce if desired.
Step 5: Simmer and Glaze
Pour the sauce into the pan with the chicken. Turn the heat up briefly to bring the mixture to a gentle boil, then reduce to a simmer. Stir occasionally for 4–5 minutes as the sauce thickens into a glossy glaze.
You’ll know it’s ready when the sauce coats the chicken and leaves a trail when stirred with a spatula.
Step 6: Serve and Garnish
Once the chicken is cooked through (no pink in the center), garnish with chopped parsley and chili flakes. Serve immediately over steamed rice, garlic noodles, or sautéed vegetables. Every bite will be coated in a luscious, sweet-savory glaze that’s pure comfort.
Serving Ideas
The beauty of this dish is its versatility — it pairs beautifully with almost any side. Here are some crowd-pleasing ideas:
- Steamed Jasmine Rice: A classic pairing that lets the sauce shine.
- Garlic Butter Noodles: Toss spaghetti or egg noodles in butter and garlic — simple yet luxurious.
- Stir-Fried Vegetables: Broccoli, bell peppers, or snow peas balance the richness of the sauce.
- Asian Cucumber Salad: Refreshing and crisp — adds a cool contrast to the warm, sticky chicken.
- Sesame Roasted Sweet Potatoes: The natural sweetness of sweet potatoes complements the honey glaze beautifully.
- Cauliflower Rice: A low-carb option that still soaks up flavor.
- Fresh Lettuce Wraps: Spoon chicken into crisp lettuce leaves for a fun, mess-free meal.
Expert Cooking Tips
Even simple dishes can go wrong with small mistakes. Avoid these pitfalls to make sure your Honey Butter Garlic Chicken turns out perfect every time.
1. Don’t Overcrowd the Pan
Crowding traps steam, making your chicken pale instead of golden. Cook in batches if needed.
2. Dry the Chicken Thoroughly
Moisture prevents browning. Always pat the chicken dry before coating with cornflour.
3. Control the Garlic
Garlic burns quickly. Lower heat before adding it, and cook just until fragrant.
4. Balance the Sauce
Taste the sauce before adding it to the pan. Too sweet? Add a dash more soy or vinegar. Too salty? Add a spoon of honey or chicken stock.
5. Don’t Skip the Cornflour
This ingredient is key to achieving a thick, sticky glaze that clings to every bite.
6. Watch the Heat
High heat is needed for searing, but once the sauce is added, simmer gently to avoid burning the sugars in the honey.
7. Garnish Smartly
A touch of chili flakes or sesame seeds adds color, texture, and depth of flavor.
Recipe Variations
This base recipe is wonderfully flexible. Try these fun twists to match your cravings:
1. Spicy Honey Garlic Chicken
Add 1 teaspoon of sriracha or chili paste to the sauce for heat. You can also double the chili flakes.
2. Honey Garlic Chicken Breasts
Swap thighs for chicken breasts. Slice into strips for quicker cooking and slightly reduce the searing time.
3. Crispy Version
Coat the chicken with a thicker layer of cornflour and fry longer before adding sauce. You’ll get extra crunch under the glaze.
4. Gluten-Free Option
Use tamari instead of soy sauce and ensure your chicken stock is gluten-free.
5. Vegetarian Option
Try the same sauce over pan-fried tofu, tempeh, or cauliflower florets for a meatless version.
6. Extra Saucy
Double the sauce ingredients for more glaze to drizzle over rice or noodles.
Storage and Reheating
Storing Leftovers
- Refrigerator: Store in an airtight container for up to 3 days.
- Freezer: Let cool completely, then freeze for up to 2 months.
Reheating Instructions
- Stovetop: Warm gently with a splash of water or stock to loosen the sauce.
- Microwave: Heat in 30-second bursts, stirring in between.
- Oven: Cover with foil and warm at 180°C (350°F) for 12–15 minutes.
Always check that the chicken is fully heated through before serving.
Frequently Asked Questions (FAQs)
1. Can I make this ahead of time?
Yes! You can prepare the sauce and sear the chicken ahead. Combine and reheat before serving for fresh flavor.
2. Can I use dark soy sauce?
Yes, but reduce the amount slightly since it’s saltier and darker than light soy sauce.
3. How do I prevent the sauce from burning?
Keep heat moderate once honey is added, and stir frequently. If it thickens too quickly, add a splash of chicken stock.
4. Can I double the recipe?
Absolutely. Just make sure to use a large enough skillet or cook the chicken in batches to maintain that golden sear.
5. What can I substitute for rice vinegar?
Apple cider vinegar or white wine vinegar works well. Add ¼ teaspoon of sugar if using either, to balance acidity.
Nutritional Breakdown (Per Serving)
- Calories: ~470 kcal
- Protein: 35g
- Fat: 22g
- Carbohydrates: 35g
- Fiber: 0.5g
- Sugar: 24g
- Sodium: ~640mg
(Values may vary based on ingredients and portion size.)
Common Mistakes to Avoid
- Using Cold Chicken: Always bring chicken to room temperature before cooking to ensure even browning.
- Skipping the Simmer: Allow sauce time to reduce; rushing results in watery coating.
- Too Much Oil: The dish should be glazed, not greasy — measure oil carefully.
- Not Tasting as You Go: Always check the balance of flavors before final plating.
- Ignoring Rest Time: Letting chicken rest for a few minutes helps retain juices and improve texture.
Behind the Recipe
This dish was inspired by the timeless blend of Asian flavors — sweet honey, rich butter, and fragrant garlic. It’s a comforting yet elegant meal that feels both homemade and gourmet. The best part? You don’t need fancy techniques or expensive ingredients.
The honey glaze is rooted in classic Asian stir-fry principles — balancing salty, sweet, sour, and umami. Over time, home cooks began adapting it with butter for a Western twist, creating this iconic fusion of flavors loved around the world today.
Tips for Perfect Presentation
- Serve on a white plate to let the golden glaze stand out.
- Sprinkle sesame seeds or green onions for a professional finish.
- Add a few lime wedges for color contrast and brightness.
- Pair with chopsticks or a small bowl of rice for an authentic dining touch.
Why This Recipe Works
Every element in this dish serves a purpose:
- Cornflour ensures crispness and a thick glaze.
- Butter rounds out the sharpness of soy and vinegar.
- Honey caramelizes beautifully, creating that irresistible sticky texture.
- Soy and garlic deliver depth, keeping the sweetness in check.
This balance is what makes the recipe foolproof and endlessly satisfying.
Reader’s Tip: Turn It Into a Meal Prep Hero
Cook double the amount and store in portions for lunches. It reheats beautifully, and a quick microwave reheat brings the sauce back to life. Pair it with steamed rice and a handful of edamame for a complete, balanced meal.
Conclusion
Honey Butter Garlic Chicken is more than just a quick dinner — it’s the kind of dish that unites simple ingredients into something that feels special. Sweet, savory, sticky, and garlicky, every bite hits the perfect balance of comfort and flavor.
With just 20 minutes of cooking and one pan to wash, it’s proof that you don’t need hours in the kitchen to make something extraordinary. Whether served over rice, noodles, or vegetables, this recipe is guaranteed to become a go-to in your home.