If you’ve ever wanted a dinner that combines simplicity with gourmet-level flavor, this Crispy Lemon Pepper Chicken is exactly that. It’s golden, juicy, and bursting with citrusy freshness and peppery spice—ready in just about 30 minutes. Whether you’re cooking for a family meal, meal prep, or an easy weeknight dinner, this dish proves that great taste doesn’t have to take all day.
The beauty of lemon pepper chicken lies in its balance: the zest brings brightness, the pepper adds heat, and the tender chicken delivers satisfying comfort. It’s elegant enough for entertaining guests, yet quick enough for busy nights when you want something special without the stress.
In this complete guide, we’ll walk through every detail—ingredients, preparation, tools, expert tips, serving ideas, storage, and FAQs—so you can make this dish perfectly every single time.
Why You’ll Love This Recipe
There are plenty of chicken recipes out there, but this one stands out because it delivers maximum flavor with minimal effort. Here’s why home cooks love it:
- 🍋 Fresh Lemon Flavor in Every Bite – The zest and juice work together to create a bright, aromatic profile.
- ⚡ Quick and Easy – From prep to plate in under 30 minutes.
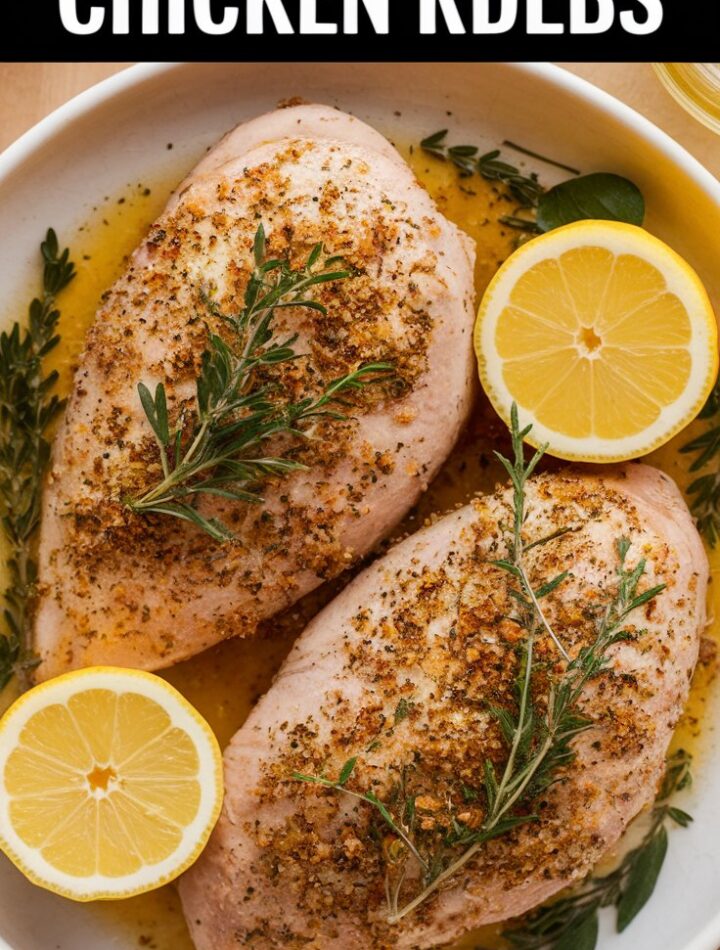
- 🔥 Crispy Outside, Tender Inside – The panko coating ensures perfect crunch without deep frying.
- 👩🍳 Beginner-Friendly – Simple steps and no special techniques required.
- 🍽️ Versatile – Pair it with grains, salads, or veggies—it fits any meal plan.
- 🌿 Light Yet Satisfying – Made with olive oil, not butter or heavy cream, keeping it fresh and dairy-free.
This recipe isn’t just about cooking chicken; it’s about creating a balance of texture, aroma, and taste that satisfies all the senses.
Ingredients You’ll Need
Every ingredient in this recipe plays a role in creating its signature flavor and crisp texture. Here’s the lineup:
For the Lemon Oil Marinade
- 3 tablespoons olive oil
- Zest of 3 fresh lemons
For the Breading
- ½ cup all-purpose flour
- ¼ cup panko bread crumbs (for crunch)
- 2½ teaspoons freshly ground black pepper
- 2 teaspoons garlic powder
- 1 teaspoon fine salt
- ½ teaspoon dried parsley
- ¼ teaspoon paprika
For the Chicken
- 4 chicken breast cutlets (or 2 large breasts sliced horizontally)
- 3 tablespoons olive oil for frying
- 1 fresh lemon, sliced into thin ¼-inch rounds
Optional Add-ons:
- A pinch of crushed red pepper flakes for heat
- 1 teaspoon onion powder for added depth
- Fresh parsley or thyme for garnish
Kitchen Tools You’ll Need
Having the right tools makes cooking smooth and stress-free:
- Sharp chef’s knife for slicing chicken evenly
- Cutting board for safe prep
- Microplane or citrus zester for extracting lemon zest
- Shallow bowls for dredging and breading
- Heavy-bottomed skillet or cast-iron pan for perfect browning
- Tongs or spatula for flipping
- Meat thermometer to check doneness
- Wire cooling rack to keep chicken crispy after cooking
Pro Tip:
Preheating your skillet properly is key to a crispy exterior. A cold pan will cause the coating to absorb oil instead of crisping.
Step-by-Step Instructions
Step 1: Prepare the Lemon Oil
Combine the olive oil and lemon zest in a small bowl. Let it sit for a few minutes to infuse. This oil is your secret weapon—it layers fresh citrus flavor into every bite without making the chicken soggy.
Step 2: Mix the Breading
In a shallow dish, whisk together flour, panko, black pepper, garlic powder, salt, parsley, and paprika.
The panko gives crunch, the pepper adds spice, and the garlic and herbs balance everything beautifully.
Step 3: Coat the Chicken
Pat the chicken dry with paper towels. Dip each cutlet into the lemon oil, coating both sides thoroughly.
Next, dredge it in the breading mixture, pressing lightly to make sure the coating adheres evenly.
Pro Tip:
Let the coated chicken rest for 5–10 minutes before frying. This helps the breading stick better and crisp up nicely in the pan.
Step 4: Heat the Skillet
Add 3 tablespoons of olive oil to your skillet and heat over medium. When the oil shimmers (but doesn’t smoke), it’s ready for cooking.
Step 5: Pan-Fry the Chicken
Place the chicken cutlets in the pan, making sure not to overcrowd. Cook for 5–6 minutes per side until golden brown and crisp.
Add lemon slices during the final few minutes to caramelize them slightly—they’ll release a fragrant, sweet aroma that complements the chicken perfectly.
Use a thermometer to check that the internal temperature reaches 160°F (71°C).
Step 6: Rest Before Serving
Transfer the cooked chicken to a wire rack and let it rest for 3 minutes. This redistributes juices, ensuring moist, flavorful meat.
Serving Suggestions
This dish is wonderfully versatile. Here are creative ways to serve it:
🍚 Over Grains
- Pair with garlic butter rice, couscous, or wild rice pilaf.
- Drizzle extra lemon oil or pan juices for added brightness.
🥗 On a Salad
- Slice and serve atop arugula or kale salad with shaved parmesan and cherry tomatoes.
- Or try it over a Caesar salad for a protein-packed twist.
🥪 In Sandwiches and Wraps
- Layer on ciabatta or baguette with lettuce and aioli for a satisfying sandwich.
- Wrap in a tortilla with hummus, cucumbers, and spinach for a light lunch.
🍝 With Pasta
- Serve alongside lemon garlic pasta or creamy fettuccine to echo the citrus notes.
- Add steamed veggies like broccoli or asparagus for a complete meal.
Eight Delicious Side Dishes
Pair your lemon pepper chicken with any of these sides for a restaurant-worthy meal:
- Garlic Butter Rice – Fragrant, soft rice that absorbs every drop of citrus flavor.
- Roasted Baby Potatoes – Crispy outside, fluffy inside, with rosemary and sea salt.
- Steamed Broccoli with Lemon Zest – Keeps the plate bright and balanced.
- Balsamic Glazed Carrots – Sweet and tangy contrast to the peppery chicken.
- Herbed Couscous – Light, fluffy, and perfect for soaking up the pan juices.
- Green Beans with Almonds – Adds crunch and color to your meal.
- Caesar Salad – Creamy dressing and crisp romaine for balance.
- Mashed Cauliflower – A low-carb, velvety base that complements the chicken perfectly.
Common Mistakes to Avoid
Even a simple recipe can go wrong without a few precautions. Here’s what to watch out for:
- Skipping the Lemon Zest – The zest contains concentrated oils that bring real citrus depth.
- Uneven Chicken Thickness – Pound your chicken evenly to avoid overcooking thin edges.
- Overcrowding the Pan – Crowding lowers the temperature, causing soggy breading.
- Adding Lemon Slices Too Early – They’ll burn and turn bitter. Add in the final minutes.
- Overcooking – Chicken breast dries out fast; always use a thermometer for precision.
Expert Tips for Perfect Results
- Use Panko for the Crispiest Texture. It’s lighter than regular breadcrumbs.
- Zest Before You Slice. It’s easier and you’ll get more aroma.
- Rest the Chicken. A short rest keeps it juicy and flavorful.
- Don’t Salt Twice. Salt in the breading is enough; extra salt can overwhelm.
- Add Heat if Desired. A pinch of cayenne or red chili flakes adds a warm kick.
- Finish with Lemon Juice. A final squeeze before serving brings everything to life.
Storage and Reheating
You can easily make extra portions and enjoy them later without losing flavor or texture.
Refrigerating
- Cool completely before storing.
- Keep in an airtight container lined with parchment to maintain crispness.
- Store up to 3 days.
Freezing
- Wrap each cutlet individually in foil or parchment.
- Place in a freezer-safe bag and freeze for up to 2 months.
- Thaw overnight in the refrigerator before reheating.
Reheating
Oven Method:
- Preheat to 400°F (204°C).
- Place chicken on a baking tray and cover loosely with foil.
- Bake 15–20 minutes, uncovering for the last 5 minutes to crisp.
Air Fryer Method:
- Preheat to 375°F (190°C).
- Reheat 8–10 minutes, flipping halfway.
Avoid microwaving—it softens the coating and ruins the texture.
Frequently Asked Questions (FAQs)
1. Can I use chicken thighs instead of breasts?
Absolutely. Boneless, skinless thighs work beautifully. They’re juicier and more forgiving. Adjust cooking time slightly, as thighs take a bit longer.
2. Is this recipe gluten-free?
Not by default, but easily adapted. Use gluten-free flour and panko substitutes made from rice or corn.
3. Can I bake this instead of frying?
Yes. Bake on a wire rack over a sheet pan at 425°F (218°C) for 20–25 minutes, flipping once halfway.
4. What oil works best for frying?
Olive oil adds flavor, but avocado or canola oil works well too, especially for higher heat.
5. Can I prepare it ahead of time?
You can bread the chicken in advance and refrigerate for up to 4 hours before frying. This helps the coating adhere even better.
6. What makes lemon zest better than juice alone?
Zest has aromatic oils that carry stronger citrus flavor without acidity. It’s the secret to this dish’s signature brightness.
7. Can I make this in an air fryer?
Definitely. Spray lightly with oil and air fry at 375°F for 10–12 minutes, flipping halfway for an even crisp.
Nutritional Highlights
(Per serving — approximately)
- Calories: 530 kcal
- Protein: 38g
- Fat: 25g
- Carbohydrates: 32g
- Sugar: <2g
- Dairy-free, high-protein, and balanced in flavor and nutrition.
Why This Lemon Pepper Chicken Stands Out
Unlike store-bought versions that rely on heavy salt or artificial seasoning, this recipe celebrates freshness. The lemon zest perfumes the chicken without overpowering it, and the cracked black pepper adds gentle warmth instead of harsh spice.
It’s comfort food that feels clean, flavorful, and light—proof that you don’t need butter, cream, or frying vats of oil to make something memorable.