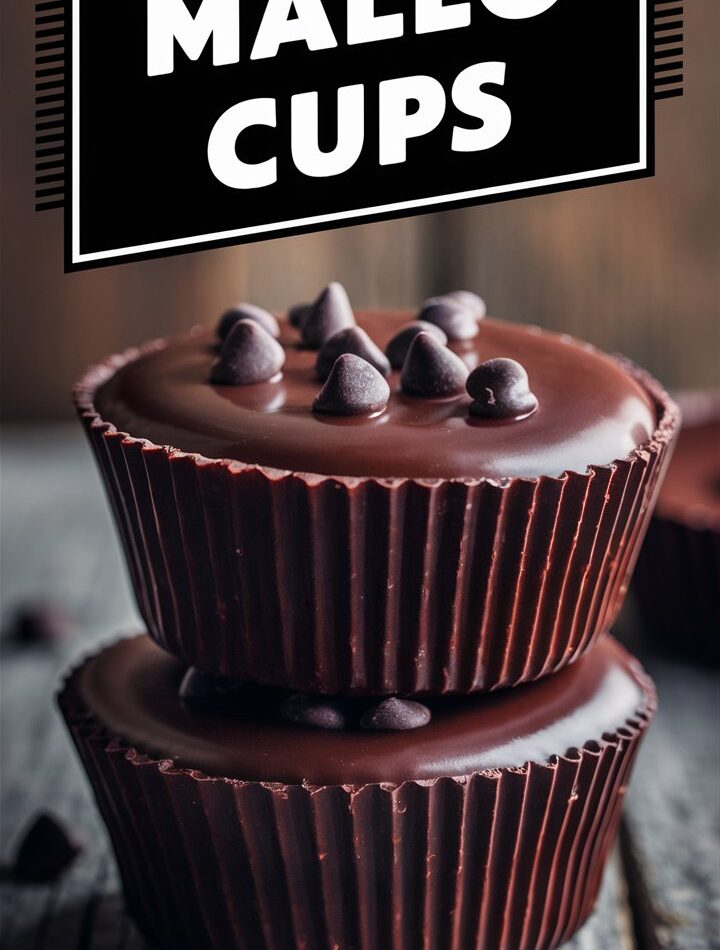
There’s something deeply comforting about a sweet treat that takes you back to simpler times. For many, Mallo Cups hold that nostalgic charm—a chewy, creamy, chocolatey memory of childhood. But why settle for the store-bought version when you can recreate (and improve upon) this classic at home?
In this complete guide, you’ll not only learn how to make homemade Mallo Cups from scratch, but you’ll also explore customizations, avoid common mistakes, and even discover ways to serve and store them like a pro. Whether you’re gifting, entertaining, or simply indulging yourself, this treat is bound to become a regular favorite.
🍫 2. What Are Mallo Cups?
Mallo Cups are a retro-style candy composed of three major layers:
- A chocolate shell (typically milk chocolate)
- A marshmallow cream center
- A sprinkle of shredded coconut for texture and flavor
Originating in the mid-20th century, these little candy cups are still widely loved. However, the homemade version offers fresher ingredients, customizable flavors, and a nostalgic experience that brings back warm memories.
🧂 3. Ingredients Overview
🧁 For the Chocolate Shell:
- 12 oz high-quality milk chocolate (chips or chopped)
- 2 tbsp refined coconut oil (optional for smoothness)
🧁 For the Marshmallow Filling:
Option 1: Store-Bought
- 1 cup marshmallow fluff (easy and quick)
Option 2: Homemade Marshmallow Fluff (for purists)
- 2 egg whites (pasteurized)
- 1/4 tsp cream of tartar
- 2/3 cup light corn syrup
- 1/2 cup granulated sugar
- 1/4 cup water
- 1/2 tsp vanilla extract
- Pinch of salt
🧁 For Topping and Texture:
- 1/3 cup shredded, unsweetened coconut (chopped fine)
🛠️ 4. Tools & Equipment You’ll Need
- Standard 12-cup muffin tin
- Paper cupcake liners
- Mixing bowls
- Spatula
- Hand or stand mixer (for fluff)
- Double boiler or microwave-safe bowl
- Pastry brush or back of spoon
- Candy thermometer (for fluff, optional)
👨🍳 5. Step-by-Step Instructions
✅ Step 1: Prepare the Muffin Tin
Line your muffin tin with paper liners. This prevents sticking and ensures easy removal.
✅ Step 2: Melt the Chocolate
Use a double boiler or microwave in 30-second intervals, stirring between each, until smooth. Add coconut oil and mix for a silky finish.
✅ Step 3: Form the Bottom Shell
Spoon 1.5 tbsp of chocolate into each liner. Use a spoon or brush to push chocolate halfway up the sides. Sprinkle 1 tsp coconut flakes in each cup. Chill for 20 minutes.
✅ Step 4: Add the Marshmallow Layer
If using homemade fluff, beat egg whites with cream of tartar until soft peaks form. Boil sugar, syrup, water to 240°F. Slowly drizzle into egg whites while beating. Add vanilla and beat until glossy (6–8 minutes).
Scoop 1.5 tbsp marshmallow fluff into each chilled cup.
✅ Step 5: Final Chocolate Top
Reheat any leftover chocolate. Pour over the marshmallow layer until sealed. Use the back of a spoon to smooth. Chill for final 20 minutes.
🍓 6. Flavor Variations to Try
- Dark Chocolate Mallo Cups: Swap milk chocolate for 70% dark chocolate. Adds richness and antioxidant benefits.
- Peanut Butter Surprise: Layer a small dollop of peanut butter under the fluff.
- Salted Caramel Swirl: Drizzle homemade caramel on the marshmallow layer before sealing with chocolate.
- Peppermint Mallo Cups: Add ¼ tsp peppermint extract to the marshmallow mixture.
- Almond Coconut Bliss: Add a whole roasted almond and dust with toasted coconut flakes.
🎯 7. Tips to Perfect the Texture and Shape
- Use fresh coconut for best taste and texture.
- Temper chocolate for a glossy finish and snap.
- Chill between every step—don’t rush.
- Use a silicone brush for even chocolate sides.
- Don’t overfill; fluff expands slightly as it sets.
❌ 8. Common Mistakes to Avoid
| Mistake | Solution |
|---|---|
| Skipping chilling steps | Chill each layer separately |
| Overheating chocolate | Melt slowly and stir often |
| Using raw egg whites | Use pasteurized eggs or store-bought fluff |
| Not sealing with chocolate | Fully seal the top layer for freshness |
| Adding wet coconut | Dry coconut slightly to prevent sogginess |
🎉 9. Creative Ways to Serve Mallo Cups
- Party Platters: Display with berries and cookies.
- Ice Cream Topping: Chop and sprinkle over sundaes.
- Cupcake Topper: Place whole on frosted cupcakes for a wow factor.
- Fondue Skewers: Serve with fruits and Mallo Cups on sticks.
- Mini S’mores Bar: Use Mallo Cups in place of regular marshmallows and chocolate.
🎁 10. How to Package for Gifting
- Use mini cupcake boxes or decorative tins.
- Add parchment between layers to avoid sticking.
- Include a tag with flavor variations and best-before date.
- Great for holidays, birthdays, party favors, or teacher appreciation gifts.
🧊 11. Storage & Shelf Life
| Storage Method | Shelf Life |
|---|---|
| Room Temperature (cool/dry) | 2–3 days |
| Refrigerator | 7–10 days |
| Freezer | Up to 3 months (in airtight container) |
Reheating Tip: Warm in microwave for 10 seconds to soften before serving.
🧮 12. Nutritional Breakdown (Per Piece – Approximate)
- Calories: 180
- Fat: 10g
- Carbs: 21g
- Sugar: 18g
- Protein: 1g
Note: Values may vary depending on ingredients used.
❓ 13. Frequently Asked Questions
Q: Can I make these gluten-free?
A: Yes! All listed ingredients are naturally gluten-free, but always check packaging.
Q: Can I skip the coconut?
A: Absolutely. You can omit it or substitute with crushed nuts or crisped rice.
Q: Is homemade fluff better than store-bought?
A: Homemade fluff offers a fresher taste, but store-bought is convenient and still delicious.
Q: Can kids help make these?
A: Yes! Let them fill cups, sprinkle toppings, or mix fluff. Just handle hot chocolate and syrup yourself.
❤️ 14. Final Thoughts
Homemade Mallo Cups are more than just a treat—they’re a nostalgic bite of joy. This guide has shown you not only how to make them, but how to elevate them into something even better than what you remember. With customizable flavors, simple tools, and easy-to-follow steps, anyone can master this beloved classic.
