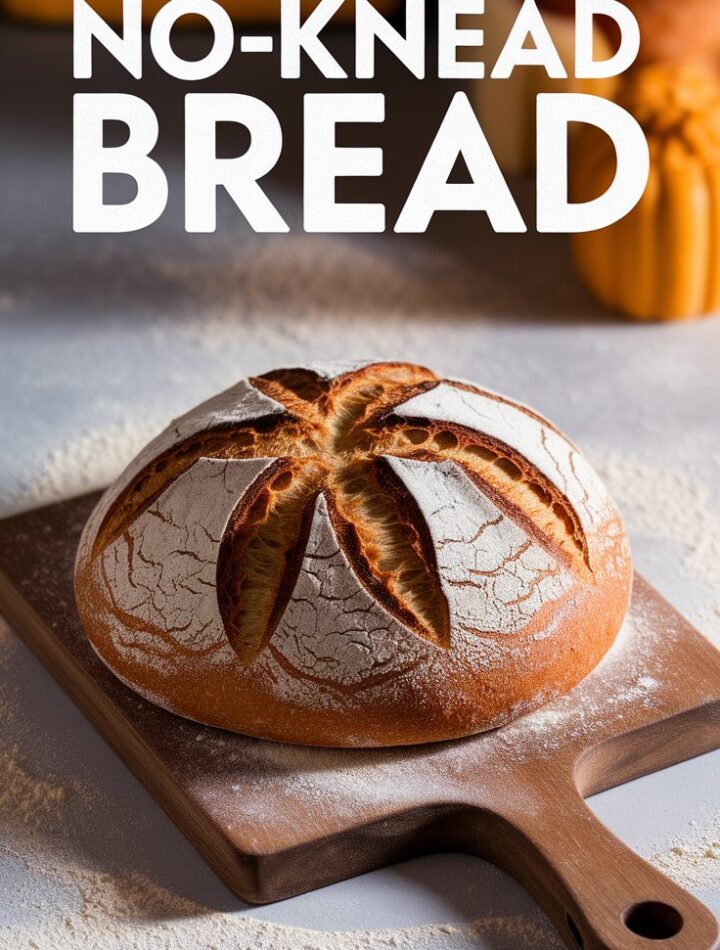
If you’ve ever dreamed of baking golden, crusty, bakery-style bread at home without kneading, stretching, or complicated steps — this is your moment.
Welcome to the ultimate no-knead bread recipe, a method so simple that even beginners can pull it off with confidence. With just four everyday ingredients and a few hours of rest, you’ll create a loaf that’s crisp on the outside, soft and airy inside, and full of that irresistible homemade aroma.
This isn’t just a recipe — it’s a bread-making revolution that proves great flavor doesn’t require great effort. Let’s dive into everything you need to know, from tools and techniques to serving ideas, expert tips, and variations you’ll love.
🧾 What Is No-Knead Bread?
No-knead bread is exactly what it sounds like: a bread dough that develops its gluten structure naturally over time, without the need for manual kneading.
This technique became famous after New York baker Jim Lahey introduced it to home bakers — and it quickly changed how people approached breadmaking forever.
Instead of spending 15 minutes kneading dough, you simply mix, rest, and bake. The long fermentation process does the hard work for you, allowing yeast and water to develop the perfect airy crumb and chewy crust.
In short:
✅ Minimal effort
✅ Simple ingredients
✅ Outstanding results
🍞 Why You’ll Love This Recipe
There are hundreds of bread recipes out there — but few are as rewarding and foolproof as this one.
Here’s why bakers of all levels fall in love with no-knead bread:
- No special skills needed: Perfect for first-time bakers or anyone short on time.
- Simple ingredients: Just flour, yeast, salt, and water.
- Artisan texture: Crispy crust, soft airy interior — looks straight out of a bakery.
- Flexible timing: You can bake the same day or let it ferment overnight for deeper flavor.
- Endless variations: Add herbs, cheese, or seeds to make it your own.
Whether you’re making toast for breakfast, sandwiches for lunch, or soup for dinner, this bread fits every occasion.
🧂 Ingredients You’ll Need
| Ingredient | Amount | Purpose |
|---|---|---|
| Bread flour | 3 cups (360g) | Creates structure and chewy texture |
| Instant yeast (rapid rise) | 2 tsp (1 packet) | Helps the dough rise quickly |
| Salt | 1½ tsp | Balances flavor |
| Warm water | 1½ cups (355 ml) | Activates yeast and hydrates dough |
Optional Mix-Ins:
- 1 tbsp olive oil (for richer flavor)
- 1 tsp sugar or honey (for a slightly sweet loaf)
- 2 tbsp chopped fresh herbs (rosemary, thyme, basil)
- ¼ cup grated cheese (cheddar, parmesan)
- 2 tbsp seeds (sunflower, flax, sesame)
These small additions can transform your loaf into something unique each time.
🧰 Tools You’ll Need
You don’t need a professional bakery setup — just a few kitchen essentials:
- Large mixing bowl – to mix and let the dough rise.
- Wooden spoon or spatula – for stirring sticky dough.
- Parchment paper – makes transferring the dough easier.
- Dutch oven with lid – traps steam, creating the perfect crust.
- Measuring cups and spoons – accuracy ensures consistent results.
- Oven mitts – safety first when handling the hot pot!
If you don’t own a Dutch oven, don’t worry — we’ll cover alternatives later in this article.
🕒 Step-by-Step Directions
Follow these clear, simple steps and you’ll have fresh, golden bread cooling on your counter in just a few hours.
Step 1: Mix the Dough
In a large bowl, combine bread flour, yeast, and salt.
Slowly pour in the warm water (around 105–110°F / 40–43°C). Stir with a wooden spoon or spatula until the ingredients form a sticky, shaggy dough.
Don’t panic — sticky dough is exactly what you want. It means the hydration level is right, and the gluten will develop naturally over time.
Step 2: Let It Rise
Cover the bowl with plastic wrap or a damp towel. Place it in a warm, draft-free spot — like inside a turned-off oven or near a sunny window.
Let it rest for 2–3 hours, or until it doubles in size and bubbles appear on the surface.
For deeper flavor, you can refrigerate it overnight and bake the next day. Slow fermentation builds complexity, similar to sourdough.
Step 3: Preheat the Oven
Fifteen minutes before baking, place your Dutch oven (with lid) inside your oven and preheat to 450°F (232°C).
This preheating step is critical — it allows the bread to form its signature crust when the steam hits the hot pot.
Step 4: Shape the Dough
Lightly dust your countertop with flour and gently transfer the risen dough onto it.
Using floured hands or a dough scraper, fold the edges toward the center a few times until you form a round loaf.
Avoid overhandling — the dough should stay soft and airy.
Place the shaped dough on parchment paper and let it rest while your oven finishes heating.
Step 5: Bake
Carefully remove the hot Dutch oven from the oven (use oven mitts!).
Lift the dough by the parchment paper and lower it into the pot.
Cover with the lid and bake for 30 minutes.
After 30 minutes, remove the lid and bake for another 15 minutes, or until the crust turns golden brown and crisp.
To test doneness, tap the bottom of the loaf — it should sound hollow.
Step 6: Cool and Enjoy
Lift the bread out of the pot using the parchment paper and place it on a wire rack.
Let it cool for at least 20 minutes before slicing.
Cooling is essential — it allows the crumb to set properly and keeps the inside soft.
🌟 Expert Tips for Perfect Results
Here are some insider tips to elevate your no-knead bread from good to professional-level:
- Sticky dough = soft bread
Resist the urge to add more flour. Sticky dough ensures an airy texture. - Preheat your pot
A cold Dutch oven won’t create steam, and your crust will be dull. - Don’t overproof
If you leave the dough too long after rising, it may collapse. - Experiment with flour types
You can replace 1 cup of bread flour with whole wheat or rye for a deeper flavor. - Add flavor layers
Mix in garlic powder, chopped olives, or a handful of shredded cheese for custom loaves. - Freeze for future use
Baked bread freezes beautifully for up to 3 months. Reheat slices in the oven or toaster.
🍽️ Serving Suggestions
This bread’s versatility is one of its best traits. Here are some ways to enjoy it:
1. Breakfast Bliss
Toast a thick slice and top it with:
- Butter and honey
- Avocado and poached egg
- Cream cheese and smoked salmon
2. Sandwiches & Paninis
The chewy crust holds fillings perfectly. Try:
- Turkey and Swiss melt
- Roasted veggie sandwich
- Caprese panini with basil pesto
3. Soups and Stews
Nothing beats tearing a warm piece of bread and dipping it into:
- Tomato basil soup
- Creamy mushroom soup
- Beef stew or chili
4. Appetizers and Dips
Serve thin slices with:
- Olive oil and balsamic vinegar
- Hummus or roasted garlic dip
- Spinach artichoke spread
5. Dinner Companion
Serve alongside:
- Grilled chicken or steak
- Shrimp scampi
- Roasted vegetables
⚠️ Common Mistakes to Avoid
Even an easy recipe can go wrong if small details are overlooked.
Avoid these common pitfalls to guarantee bakery-quality results:
- Adding too much flour – makes bread dense and dry.
- Skipping Dutch oven preheat – leads to poor crust formation.
- Using cold or hot water – yeast won’t activate properly.
- Cutting too soon – steam needs time to escape before slicing.
- Leaving out salt – dulls flavor and affects yeast activity.
🧠 Baking Science: Why No-Knead Works
Kneading normally builds gluten through physical movement. In no-knead recipes, time replaces motion.
As the dough sits, enzymes in the flour break down proteins, allowing gluten strands to form slowly.
The result: elastic structure without any work from you.
Meanwhile, yeast consumes sugars and releases carbon dioxide, creating bubbles that give the bread its airy crumb.
It’s a perfect balance between chemistry and patience.
🧊 Storage and Reheating
- Room Temperature:
Store leftover bread in a paper bag or wrapped in parchment. Avoid airtight containers — they make the crust soggy. - Freezing:
Slice before freezing, wrap in plastic or foil, and store up to 3 months. - Reheating:
Warm in a 350°F (175°C) oven for 10–15 minutes, or toast individual slices directly from frozen.
🪄 Creative Variations
No-knead bread is a blank canvas for creativity. Try these twists:
- Herb & Garlic Bread: Add minced garlic and rosemary before the rise.
- Cheddar Jalapeño Bread: Stir in chopped jalapeños and shredded cheddar.
- Honey Oat Loaf: Replace 2 tbsp flour with oats and add 1 tbsp honey.
- Olive & Feta Bread: Mix in sliced olives and crumbled feta cheese.
- Cinnamon Raisin Bread: Add raisins, cinnamon, and a touch of sugar for a sweet breakfast loaf.
Each version bakes beautifully with the same core process.
❓ Frequently Asked Questions (FAQs)
1. Can I use all-purpose flour instead of bread flour?
Yes, but bread flour gives a chewier texture due to its higher protein content.
2. What if I don’t have a Dutch oven?
Use any heavy oven-safe pot with a lid, or bake on a baking sheet with a small tray of water in the oven to create steam.
3. Can I let the dough rise overnight?
Absolutely. Refrigerate the dough overnight for a more developed, complex flavor.
4. My dough didn’t rise — what went wrong?
Check your yeast freshness and water temperature. Old yeast or hot water can prevent rising.
5. How do I make the crust softer?
Wrap the hot loaf in a clean kitchen towel while cooling to trap steam.
6. Can I make mini loaves or rolls?
Yes! Divide dough into portions and bake in smaller Dutch ovens or muffin tins (reduce bake time slightly).
💬 Expert Baker’s Insight
The beauty of no-knead bread lies in its forgiveness. Unlike traditional recipes that demand precision and technique, this method thrives on simplicity.
Your only real tools are patience and good ingredients. The longer it rests, the better it tastes — just like a slow-cooked meal.
And once you’ve mastered this base recipe, you can elevate it endlessly — adding seeds for crunch, herbs for fragrance, or cheese for indulgence.
Each loaf tells a story of your creativity.
❤️ Why Homemade Bread Matters
Baking bread is more than just a kitchen task — it’s an experience.
The smell of freshly baked bread has a calming, nostalgic magic.
It turns a regular day into something special, filling your home with warmth and comfort.
Store-bought bread can’t compete with that — not in flavor, texture, or love.
This recipe brings that experience to everyone, no matter their skill level or schedule.
🌍 Sustainability Note
Homemade bread is also eco-friendly and economical.
You control what goes into it — no preservatives, no additives, and minimal packaging waste.
Plus, baking at home can cost less than half of store-bought artisan loaves.
Every loaf you bake is a small step toward mindful living.
🏁 Final Thoughts
This Quick and Easy No-Knead Bread recipe is a perfect blend of simplicity and sophistication.
It’s forgiving, flexible, and endlessly customizable — ideal for anyone who loves homemade comfort without the fuss.